Thursday, September 25, 2014

Lush Lashes

What better way to frame your eyes then with a rich flutter of the lashes?! This fall, don’t be scared to layer on the mascara for a thick, almost fake lash effect. A little clumping is ok – it is part of this pretty-with-a-twist-of-punk look! This entry is all about a fluttering frame for your peepers!


      Lash tools I rely on: 

     1) Oil as a lash conditioner/treatment for overnight nourishment. Simply smudge the oil into lash roots until lashes are covered and then leave on overnight. It’s a life saver for brittle lashes. 

       2) A good eyelash curler. Makes all the difference in the quest for long-looking lashes and wide-awake-looking eyes! I use it every day, with or without mascara.

      3) Lash brush/comb. Smooth and separate lashes flawlessly with a good lash comb.

      4) Disposable mascara wands. A must for any makeup artist for hygienic reasons, I make sure I’m always stocked up on these. I also use them as eyebrow combs!


A full fall flutter


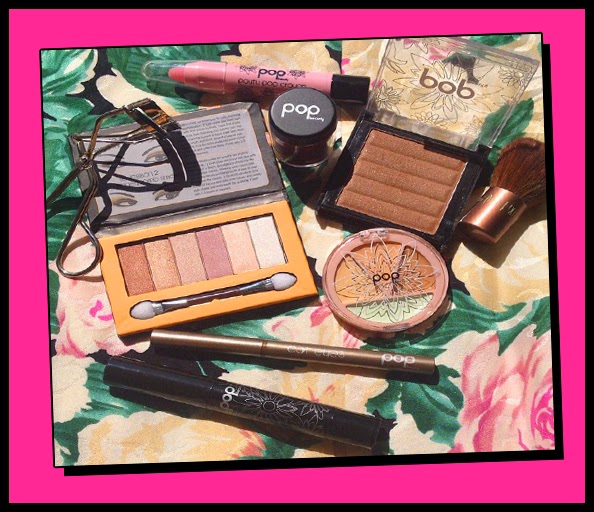
1) Start by smoothing Face Magnet Primer all over complexion, including around the eyes and onto eyelids. The caffeine in the primer will help tighten and stimulate blood circulation. This formula also brightens and evens out the skintone, camouflaging imperfections.

2) Continue by buffing No Show No Shine Powder into complexion using a large brush (POP’s kabuki brush is ideal). Focus on oily areas of the face, like the T-zone and leave cheekbones bare.

3) Curl lashes and apply No Clump Comb Mascara as a lash primer. Let it set and dry before applying another layer. 

4) Carefully curl lashes once more (if you have very brittle lashes, you can skip this), and follow with at least 3-4 coats of Serious Lash Pop Mascara. Again, let each coat dry a little before applying the next.

5) Pick one of the orange hues from Rouge Mix and paint onto lips. Use same hue and dab onto the apple of the cheek. Dust a little powder on top of lips & cheeks to help set.


      And for those special occasions, there are always falsies!! Here’s a selection of my favorite ones  J

 Make sure you pick a glue that works for you & pay extra attention to fasten the lash at the inner corner of the eye. I like to adhere that part of the lash first so that it stays looking perfect all night! 

Have a great start to the fall & flutter on!


Thursday, September 18, 2014

A classic POP of color!

One of my favorite makeup styles is one of the most effective yet classic of them all – a pop of color. Nothing works better to liven up those eyes and than to add a brighter accent to your favorite neutrals! Keep playing with color to find out how to truly POP your own unique way!

The constant state of a makeup artist’s hands! And actually, here I am only getting started!


Classic POP of color

To keep a brightened eye sophisticated, try lining only the lower lash line with your favorite color – the lift is instant!

1.  Apply Beam Base Primer all over face (including around the eyes) with a sponge, acrylic brush or clean fingertips. This will add a subtle glow while protecting & nourishing the skin. This primer contains a blend of vitamins & salt water pearl extract and will hold onto the rest of your makeup all day!
 
2. Next, dip a fluffy blush brush into Double Duty Bronzer and smooth onto forehead, cheekbones & jaw bone. Blend well. Apply the slightly peachier hue onto the apples of the cheeks for a subtle POP of color and an extra ray of warmth.

3. Pick one of the neutral hues in the POP Portfolio and smooth onto upper eyelids. Then pick one of your favorite brightening colors (blue, green, purple, etc) and blend into the lower lash line, all the way into the inner and outer corner of eyes.

4. Curl lashes carefully. Then apply at least 3 layers of No Clump Comb mascara, letting each layer dry a little before applying the next.

5. Perfect this look by smoothing Plump Pout in Bare Nectar onto clean lips for gorgeously nude, kissable lips! Have fun!


Two more examples of ways to play with POP accent hues:

The first gorgeous look is created by @vlcmakeup using POP products! 
The second is me - I love combining neutrals or a smoky eye with a flash
of bright glitter right above the pupil.


Some of my favorite POP palettes to add the classic, eye-brightening and lid-lifting color POP!

www.popbeauty.com


Friday, September 12, 2014

Ripe Reds

There are few things more lush than this time of the year, when all my favorite fruits, veggies and berries turn into a rich & ripe red. Strawberries, tomatoes, and apples give a lot of inspiration to accessorize your look in many different ways. This blog is about a fabulous fall hue: red!


A classic, brightly-hued Nail Glam, aptly named: Ripe Red!


       A few of my favorite red things! Nail Glam, Stain Stay, shades, earrings, strawberries and Lucas Papaw Ointment.


 Picture via: Sylvestermanor.org


       One of my favorite hangouts in the Hamptons – the farm stands! Organic, freshly picked tomatoes…I can find a hundred ways to cook them. Or just eat them raw! They taste nothing like the store bought ones – so much more delicious!


 Me in my favorite red lippie…Stain Stay!  It comes with me on all of my travels J


Wednesday, September 03, 2014

Late blossoms & lasting bronze glows

 As summer is starting to turn to fall, the last blossoms are peeking through and we all dream about how to keep that bronze glow going…make the most of your current late summer glow by adding a smoky bronze pop to eyes. Metallic burnt bronzes complement all complexions and eye colors, seamlessly taking you from the freshness of summer to the more sultry feel of fall!


Late August blooms in a little meadow close to my house


               Smoky Bronze for a Flattering Fall!


1. Smooth your favorite medium-coverage foundation over complexion, building and blending until the finish is flawless. Then blend Eye Magnet Primer onto eyelids and just below the lower lash line. 

2. Buff the Sunkissed Bronzer onto apples of the cheeks & blend well. Also apply subtly onto cheekbones to help sculpt. 

3. Now dust the deepest bronze Pure Pigment into the crease of the eye and blend until the edges are seamless. Also extend this shade onto the lower lash line. Follow by dusting the nude pigment onto inner corner of the lid & eye. Fine tune by adding a small touch of the glimmery white pigment solely onto the very inner corner of the eye.

4. Next, line with the black In-Liner. Build the line slightly so that it is thickest toward the outer corner of the eye. Also apply this to the upper & lower waterline.

5. Curl lashes and apply several coats of Serious Lash Pop Mascara. Let each layer dry a little before applying the next. Build until you have a faux lash effect. Lastly, mix a little of the nude pigment in with your favorite clear lip balm and smooth onto puckers.


 My go-to bronze enhancers that keep my glow going! 


Soaking up the last of the summer sun and keeping my lips in a luscious & blooming shade while doing so! Hope you are all enjoying the last flutter of summer!