Thursday, November 13, 2014

Fall Fabulousness!


Are you embracing all the gorgeous hues this season is providing us with? Wherever I look, nature is popping with gleaming golds, flickering & fiery reds and oh-so-oranges…you just can’t help but to get inspired! Let’s feel some of the fabulousness of fall!


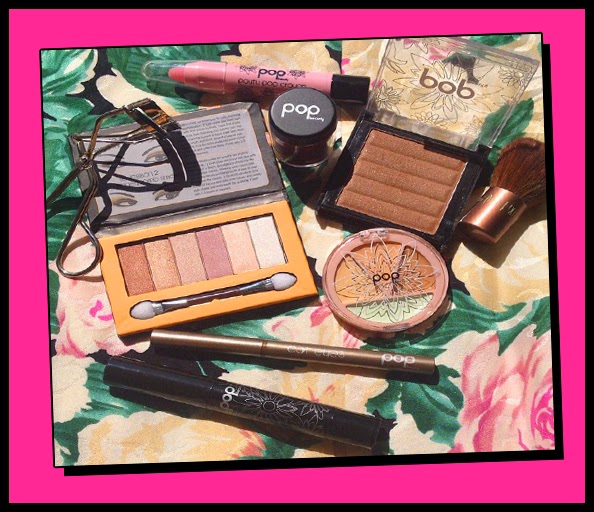
A few of my favorite flaming POP oranges!


   WEARABLE WARMTH


 1. Start by smoothing your favorite moisturizer all over face and let absorb for a few moments. Follow with Beam Base Primer in Balmy Bronze and blend well. The primer will even out complexion, add a glow & treat skin with a sophisticated blend of skin-loving extracts.

2. Next, wet a nylon brush very slightly & dip into 7th hue from the left in the I-Palette and smooth onto lid, creating an even, subtly metallic finish.  

3. Follow by dusting Pure Pigment in Metallic Copper very lightly into the crease, blending until seamless. A light hand is required here. 

4. Curl lashes and apply 2-3 light layers of Peak Performance Mascara. Push mascara comb gently into roots of the lashes and zig-zag upward as you simultaneously fan outward. 

5. Blend a tiny bit of BB Balm in Toffee Nude onto apples of the cheeks and blend gently. 

6. Lastly, smooth the same BB Balm onto lips & pucker up!


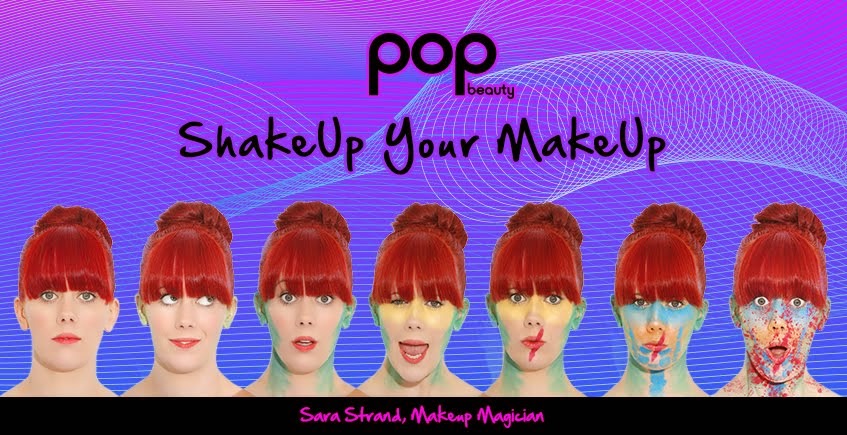
A little POP play with burnt orange, bright yellow & massive lashes!


How do you wear orange & yellows? Share your looks with us on Instagram
& Facebook!


Thursday, October 23, 2014

Current skincare musts!

As the weather is getting cooler, I am reviewing my skin care routine to make sure my skin is properly protected and moisturized as we head into winter! Below are my current skin care go-to’s! 


ERNO LAZLO PHORMULA 3-9 REPAIR BALM – I love the feel of this balm. Rich and comforting, yet not oily, it helps strengthen & nourish skin while reducing irritation. Is apparently a wonder remedy for scars, burns and sun-exposed skin!


RODIAL STEMCELL SUPER-FOOD FACIAL OIL – This ultra light oil feels almost like a watery/gel texture. My skin looks well nourished and glowing after each use! 


 CREMORLAB SMOOTH PUDDING – Another amazing product from Korea! I adore the feel and scent of this smooth moisture balm. I have used up nearly all of it in almost 2 weeks! My skin looks and feels visibly smoother and healthier when I am using it. Well worth a try! 


PIXI BEAUTY SERUM & AVEDA BOTANICAL KINETICS HYDRATING LOTION – Two all-time favorites!! The hydration and deliciously addictive herbal scents of these two have me constantly coming back for more! The Pixi Beauty Serum is not easy to come by (it’s only sold in the London flagship store), but it is well worth it once you get your hands on some. Apply over your favorite moisturizer and watch your skin transform to a satin-like, ultra soft finish. It creates radiance and treats skin as you wear it. Made with 100% botanical extracts and essential oils. Yum!! 


MAKE YOUR OWN!
For 100% natural and economically-friendly skincare, make your own! I adore this homemade brown sugar scrub. I use it about once a week to remove dead skin cells and gently buff & brighten complexion. Mix the below ingredients in a bowl, and then use clean fingertips to massage into complexion in circular movements. Leave on for 3-4 minutes and rinse off with lukewarm water. Follow with your favorite moisturizer & Face Magnet Primer.


Ingredients
1/2 cup manuka honey (plain honey will work fine too!)
1/2 cup brown sugar (basic refined white sugar works in a pinch)
1 tbsp olive or coconut oil
1 drop of your favorite essential oil (lavender, jasmine, rose, geranium, bergamot are all nice)


       The last (and perhaps most important) step in my skincare routine and definitely the key first step in my makeup routine, is the Face Magnet Primer. Packed with vitamins and caffeine, it depuffs, brightens and helps hold onto makeup all day!


Friday, October 17, 2014

Bright Delight Blast!

Come summer, spring, winter or fall, we all need that little spark of bright to enliven things – why should our makeup bags be any different? Our Bright Delight palette delivers amazingly rich pigments to any look, what you see in in the palette is the effect you get on the skin. This week’s post is all about a little bright delight J


Fresh for Fall

It’s not ALL about the reds and oranges this fall! Play with punchy liners to perk up your eyes, like this blazing blue framer! 


1. Smooth Face Magnet Primer onto clean skin, creating a smooth surface and a fresh complexion.

2. Softly fill in your brows with the hue from Brow Shape & Shade that closest matches your own brows. Use one of the lighter hues from the palette to create a base shadow on the upper lid.

3. Dampen an eyeliner brush and dip into the electric blue hue of the Bright Up Your Life palette. Using short strokes, draw onto lash line to create a thick, dramatic line. Keep wetting the brush to keep the pigmentation intense. Flick the line upward and outward toward the outer corner of the eye. Keep perfecting until you have achieved desired results.

4. Apply our amazing No Clump Comb Mascara using zig-zag movements to cover each and every little lash. 

5. Smooth Plump Pout in Bare Nectar onto lips and get ready for the attention! 


Thank you to @ishtapalomo for creating this bright & playful look


@gilmarynotgigi is looking gorgeous in the purple & pink hues of the palette! Thank you for sharing your look!


Wednesday, October 08, 2014

The Beauty of BB!

I love the modern merge of skin care and makeup. Lately there are so many amazing formulas that extend past your regular BB & CC creams for face – you can also find these camouflaging, concealing, brightening & treating formulas specifically for body, lips & hair! Below are a just a few examples of some of my current favorites…


I love this BB body cream from Jergens. It helps hydrate, smooth and brighten the skin, minimizes the appearance of imperfections & visibly firms the skin as you wear it. It also claims to improve & perfect the skin gradually as you wear it. I love smothering my legs in it for a flawless “naked” glow when wearing skirts or dresses. 


BB FOR LIPS!


I always have one of these BB Lip Balms in every purse. Light in color but rich in hydration, they moisturize and prettify. Infused with argan oil and vitamin E. 


BARE BEAUTY


1) Start by smoothing CC Cream onto face. Apply as you would a moisturizer, using warm, clean fingertips. Keep building until complexion appears brightened and flawless. 

2) Follow with the No Show Camouflage Fix palette to conceal and perfect more stubborn areas, like around the eyes, nose and chin. The light greenish hue in the palette immediately camouflages redness & spots. 

3) Next, brush the matte nude shade from the AM Palette onto the eyelid and all the way up to the brow. Follow by softly blending the naked brown hue into the crease of the eye. Keep blending until seamless. Use the same brown to softly fill in brows. Lastly, dab a bit of the softly shimmering eggshell hue onto the brow bone for a subtle highlighting effect.

4) Curl lashes and comb through with No Clump Comb Mascara to coat lashes with a treatment tint. This mascara creates a natural yet lengthening flutter.

5) Finish this gorgeous BB look off with smoothing BB Lip Balm in Toffee Nude onto lips. Also dab a little of the same balm onto apples of cheeks and blend upwards, softly underneath the cheekbone for a subtle contour effect. Gorgeous!!


Wednesday, October 01, 2014

The magic of mint!

Our Mint Magic Nail Glam has been an explosive favorite since the day it launched! It is flying off the shelf year round, no matter the trends or season. I think it could be because it is simply that perfect blue-mint hue that makes you happy each time you catch a glimpse of your nails J


Add hashtags #mintmagic & weekly #manicuremonday on social media to have your Mint Magic manicure showcased on our instagram and facebook pages! 


Below are just a few of our favorite Mint Magic manicures…keep the magic going!


MINT & GOLD!

 Thank you@punkrockangel2004


PURE MINT!
     
Thank you @dlopezmua


PINK & MINT!

Thank you @versianails 


Thursday, September 25, 2014

Lush Lashes

What better way to frame your eyes then with a rich flutter of the lashes?! This fall, don’t be scared to layer on the mascara for a thick, almost fake lash effect. A little clumping is ok – it is part of this pretty-with-a-twist-of-punk look! This entry is all about a fluttering frame for your peepers!


      Lash tools I rely on: 

     1) Oil as a lash conditioner/treatment for overnight nourishment. Simply smudge the oil into lash roots until lashes are covered and then leave on overnight. It’s a life saver for brittle lashes. 

       2) A good eyelash curler. Makes all the difference in the quest for long-looking lashes and wide-awake-looking eyes! I use it every day, with or without mascara.

      3) Lash brush/comb. Smooth and separate lashes flawlessly with a good lash comb.

      4) Disposable mascara wands. A must for any makeup artist for hygienic reasons, I make sure I’m always stocked up on these. I also use them as eyebrow combs!


A full fall flutter


1) Start by smoothing Face Magnet Primer all over complexion, including around the eyes and onto eyelids. The caffeine in the primer will help tighten and stimulate blood circulation. This formula also brightens and evens out the skintone, camouflaging imperfections.

2) Continue by buffing No Show No Shine Powder into complexion using a large brush (POP’s kabuki brush is ideal). Focus on oily areas of the face, like the T-zone and leave cheekbones bare.

3) Curl lashes and apply No Clump Comb Mascara as a lash primer. Let it set and dry before applying another layer. 

4) Carefully curl lashes once more (if you have very brittle lashes, you can skip this), and follow with at least 3-4 coats of Serious Lash Pop Mascara. Again, let each coat dry a little before applying the next.

5) Pick one of the orange hues from Rouge Mix and paint onto lips. Use same hue and dab onto the apple of the cheek. Dust a little powder on top of lips & cheeks to help set.


      And for those special occasions, there are always falsies!! Here’s a selection of my favorite ones  J

 Make sure you pick a glue that works for you & pay extra attention to fasten the lash at the inner corner of the eye. I like to adhere that part of the lash first so that it stays looking perfect all night! 

Have a great start to the fall & flutter on!


Thursday, September 18, 2014

A classic POP of color!

One of my favorite makeup styles is one of the most effective yet classic of them all – a pop of color. Nothing works better to liven up those eyes and than to add a brighter accent to your favorite neutrals! Keep playing with color to find out how to truly POP your own unique way!

The constant state of a makeup artist’s hands! And actually, here I am only getting started!


Classic POP of color

To keep a brightened eye sophisticated, try lining only the lower lash line with your favorite color – the lift is instant!

1.  Apply Beam Base Primer all over face (including around the eyes) with a sponge, acrylic brush or clean fingertips. This will add a subtle glow while protecting & nourishing the skin. This primer contains a blend of vitamins & salt water pearl extract and will hold onto the rest of your makeup all day!
 
2. Next, dip a fluffy blush brush into Double Duty Bronzer and smooth onto forehead, cheekbones & jaw bone. Blend well. Apply the slightly peachier hue onto the apples of the cheeks for a subtle POP of color and an extra ray of warmth.

3. Pick one of the neutral hues in the POP Portfolio and smooth onto upper eyelids. Then pick one of your favorite brightening colors (blue, green, purple, etc) and blend into the lower lash line, all the way into the inner and outer corner of eyes.

4. Curl lashes carefully. Then apply at least 3 layers of No Clump Comb mascara, letting each layer dry a little before applying the next.

5. Perfect this look by smoothing Plump Pout in Bare Nectar onto clean lips for gorgeously nude, kissable lips! Have fun!


Two more examples of ways to play with POP accent hues:

The first gorgeous look is created by @vlcmakeup using POP products! 
The second is me - I love combining neutrals or a smoky eye with a flash
of bright glitter right above the pupil.


Some of my favorite POP palettes to add the classic, eye-brightening and lid-lifting color POP!

www.popbeauty.com


Friday, September 12, 2014

Ripe Reds

There are few things more lush than this time of the year, when all my favorite fruits, veggies and berries turn into a rich & ripe red. Strawberries, tomatoes, and apples give a lot of inspiration to accessorize your look in many different ways. This blog is about a fabulous fall hue: red!


A classic, brightly-hued Nail Glam, aptly named: Ripe Red!


       A few of my favorite red things! Nail Glam, Stain Stay, shades, earrings, strawberries and Lucas Papaw Ointment.


 Picture via: Sylvestermanor.org


       One of my favorite hangouts in the Hamptons – the farm stands! Organic, freshly picked tomatoes…I can find a hundred ways to cook them. Or just eat them raw! They taste nothing like the store bought ones – so much more delicious!


 Me in my favorite red lippie…Stain Stay!  It comes with me on all of my travels J


Wednesday, September 03, 2014

Late blossoms & lasting bronze glows

 As summer is starting to turn to fall, the last blossoms are peeking through and we all dream about how to keep that bronze glow going…make the most of your current late summer glow by adding a smoky bronze pop to eyes. Metallic burnt bronzes complement all complexions and eye colors, seamlessly taking you from the freshness of summer to the more sultry feel of fall!


Late August blooms in a little meadow close to my house


               Smoky Bronze for a Flattering Fall!


1. Smooth your favorite medium-coverage foundation over complexion, building and blending until the finish is flawless. Then blend Eye Magnet Primer onto eyelids and just below the lower lash line. 

2. Buff the Sunkissed Bronzer onto apples of the cheeks & blend well. Also apply subtly onto cheekbones to help sculpt. 

3. Now dust the deepest bronze Pure Pigment into the crease of the eye and blend until the edges are seamless. Also extend this shade onto the lower lash line. Follow by dusting the nude pigment onto inner corner of the lid & eye. Fine tune by adding a small touch of the glimmery white pigment solely onto the very inner corner of the eye.

4. Next, line with the black In-Liner. Build the line slightly so that it is thickest toward the outer corner of the eye. Also apply this to the upper & lower waterline.

5. Curl lashes and apply several coats of Serious Lash Pop Mascara. Let each layer dry a little before applying the next. Build until you have a faux lash effect. Lastly, mix a little of the nude pigment in with your favorite clear lip balm and smooth onto puckers.


 My go-to bronze enhancers that keep my glow going! 


Soaking up the last of the summer sun and keeping my lips in a luscious & blooming shade while doing so! Hope you are all enjoying the last flutter of summer! 

Thursday, August 28, 2014

Pinky Punk!

Pink is more often then not connected with all things girly and cute. However, this hue can also be edgy and lend itself to a little bit of pretty punk, which is what this blog post is all about!


                    Pinky Punk Look


1. Start by targeting areas on the face that need a little No Show Camouflage Fix. Apply concealing pigments to skin using clean, warm fingertips. Dab (do not drag) the formula for best results. Don’t forget eyelids! Try the greenish hue in the palette for maximum effect in camouflaging any redness in skin (which is VERY important when using pink shades).    

2. Dust the pink Pure Pigment evenly onto lids, almost all the way up to the brow. Blend well. Then, line the inner rim of the lower lash line with the fuchsia Kajal Pen. Warm the pen up a little on the back of the hand before applying. 

3. Now, fill in brows using our Brow Shape & Shade kit. Think dramatic rather then natural. Comb brows through using the comb side of the brush provided, brushing upward and outward to fan brow hairs “away” from eyes. Next, use a bit of the darkest hue in the brow palette to define the lower lash line. 

4. Pick a pink in the Rouge Mix palette that suits your complexion and use clean fingertips to blend into the apples of the cheeks for a subtle pink lift to the face. Then, use brush to apply the same hue onto lips.

5. Finish off by curling lashes and applying several coats of your favorite POP mascara!


 Pinky must haves for a party night!


I love this pinky leopard mani created by @pocketmonsterlogan


Wednesday, August 20, 2014

Dew & Definition

Few things exclaim “health” as much as a nice subtle dew to the skin! This blog is about that healthy glow to the skin, whether we have it naturally or need to cheat a little J


Our Pure Pigments add a glow in no time at all. I adore how multi-purpose they are – use on eyes, cheeks, lips, face, body, wet or dry! I love mixing a few sprinkles in with my primer to add a glow to skin, or mixing with a clear nail polish for a metal effect on nails. Also mix with body lotion, hair gel, foundations, lip gloss – or just dust onto your favorite shadow for a added metal intensity…the options are endless really! Here I have teamed the neutral pigment kit with my favorite electric blue liner for a dewy pop effect.


            Summer dew & definition!

 
1. Start by smoothing on Beam Base primer in Balmy Bronze. Use about a coin sized amount and buff & blend into complexion and eyelids. This treatment primer heals, nourishes, evens out the skintone and adds a super healthy glow.

2. Blend a little of one of the neutral hues in the Naturally Bare palette (pick one that is only slightly darker than your skintone) onto eyelid. Blend a touch of one of the lighter hues into the inner corner of the eyes.

3. Next, define the eyes with Ink Outliner, using small short strokes and lifting the line outward and upward towards the temples. Keep building until you have desired thickness and intensity. Then, using a flat liner brush, trace the black line with the deepest brown in the Naturally Bare palette, smudging a little to blend the two together.

4. Curl lashes and apply the No Clump Comb Mascara to upper and lower lashes. Let one layer dry before applying the next.

5. Finish off this naturally gorgeous look by smoothing BB Lip Balm in the nude hue onto lips. Defined with a touch of dew...gorgeous!


Best way to get dewy-looking skin? Eat lots of veggies!! I love making my own homemade stews & juices…Pack your diet full of water and fresh veggies, and you will see a difference in no time. But you knew that already, right? J


Current favorite glow-inducing product? Without a doubt, it’s the amazing Pixi Glow Tonic! If you have yet to try it, it’s a must! With potent natural ingredients, it is slightly exfoliating and creates the most gorgeous glow on your skin! Glow on!!

Thursday, August 07, 2014

Natural with Color Clashes

Summer in the sun makes me want to go a bit lighter on the makeup then usual. I love bronzed, natural-looking skin with just a little clash of color like a bright red on the lips, or a neon orange on toenails, peeking out through sandals. This entry is about being natural, with a little pop of color clash.


My favorite palette to create a little clash of color – the Bright Delight palette! I can find at least a million ways to use it – I love using one of the hues (any of them!) smudged into lower lash line for a subtle peeper pick-up!


 A “Natural with Clashes” look

1) Even out imperfections and softly contour skin by blending No Show Camouflage Fix onto complexion. Use warm, clean fingertips and press into skin. Use the light green-yellow to counteract redness and to lighten any darkness, as well as top of cheekbones. Mix to customize concealer shades as needed to match & perfect complexion. Blend well.


2) Using the Naturally Bare palette, take the light pearl (top row, second from left) and brush onto eyelids & into the corner of the eyes. Then use the soft caramel (bottom row, second from left) into the outer corner of the crease. Blend well. Grab a slightly bigger brush and blend a little of the same caramel hue onto the apples of the cheeks and blend well.

3) Curl lashes and apply Lash Kapow mascara from roots tips of lashes using zig-zag movements. Use brush to fan lashes outward and upward, coating each and every lash. Keep building until you have a jet black, volumized and dramatic lash effect.

4)Smooth the BB Lip Balm in Pink Lemonade onto lips. Kiss off excess onto a napkin and apply one more coat. Throw lip balm into purse or pocket for touch-ups on the go and a nourishing lip treat!

5)Apply Nail Glam in Orange onto nails. Stroke the brush from base to tip, once in the center and a stroke to either side for a clean finish. Apply a second coat for more colour intensity.


     Me and my lovely sister, makeup-free apart from bright lips. Easy transition from beach to dinner!


     Kiss, swim, eat & drink proof. Can’t think of a better summer lip companion than Stain Stay. With a slight dew, this lip ink won’t budge and eliminates the need for touch-ups! The Poppy Kiss shade is that perfect tone of classic red that suits everyone. LOVE!


Wednesday, July 30, 2014

Beam, Bronze & Balms!

Summer is about feeling bronzed, balmy and all beamed up! Here are some of my current favourites!


Body Beam Base is designed to add a balmy glow to legs, arms & décolletage. It treats dryness, minimizes
the appearance of uneven skin and adds a silky light reflecting glow. Your skin looks soft, silky and healthily
beamed up!


The sheer & lightweight formula blends like silk onto skin and adds a gorgeous
yet subtle tropical scent. So perfect for summer when you do not want to wear a 
perfume but you still want to smell great! 


Our current amazing bronze collection of cakes, powders, glows, bases and liners –  you’ll find a favourite here to keep your glow going way into Fall!


Choosing what BB Lip Balm to make a staple in my new favourite Kate Spade purse. 

My lips are feeling SO soft since I started using these, and I love all four colors. Thankfully they will all fit ;)